Deprecated: Creation of dynamic property AAWP_Table_Builder_Functions::$items_max is deprecated in /home/customer/www/footwearboss.com/public_html/wp-content/plugins/aawp/includes/class.aawp-functions.php on line 74
Deprecated: Creation of dynamic property AAWP_Table_Builder_Functions::$cache_duration is deprecated in /home/customer/www/footwearboss.com/public_html/wp-content/plugins/aawp/includes/class.aawp-functions.php on line 76
Deprecated: Creation of dynamic property AAWP_Table_Builder_Functions::$affiliate_links is deprecated in /home/customer/www/footwearboss.com/public_html/wp-content/plugins/aawp/includes/class.aawp-functions.php on line 77
Deprecated: Creation of dynamic property AAWP_Table_Builder_Functions::$title_length_unlimited is deprecated in /home/customer/www/footwearboss.com/public_html/wp-content/plugins/aawp/includes/class.aawp-functions.php on line 79
Deprecated: Creation of dynamic property AAWP_Table_Builder_Functions::$title_length is deprecated in /home/customer/www/footwearboss.com/public_html/wp-content/plugins/aawp/includes/class.aawp-functions.php on line 80
Deprecated: Creation of dynamic property AAWP_Table_Builder_Functions::$title_adding is deprecated in /home/customer/www/footwearboss.com/public_html/wp-content/plugins/aawp/includes/class.aawp-functions.php on line 81
Deprecated: Creation of dynamic property AAWP_Table_Builder_Functions::$image_link_title_adding is deprecated in /home/customer/www/footwearboss.com/public_html/wp-content/plugins/aawp/includes/class.aawp-functions.php on line 82
Deprecated: Creation of dynamic property AAWP_Table_Builder_Functions::$description_length_unlimited is deprecated in /home/customer/www/footwearboss.com/public_html/wp-content/plugins/aawp/includes/class.aawp-functions.php on line 85
Deprecated: Creation of dynamic property AAWP_Table_Builder_Functions::$description_length is deprecated in /home/customer/www/footwearboss.com/public_html/wp-content/plugins/aawp/includes/class.aawp-functions.php on line 86
Deprecated: Creation of dynamic property AAWP_Table_Builder_Functions::$description_html is deprecated in /home/customer/www/footwearboss.com/public_html/wp-content/plugins/aawp/includes/class.aawp-functions.php on line 87
Deprecated: Creation of dynamic property AAWP_Table_Builder_Functions::$teaser is deprecated in /home/customer/www/footwearboss.com/public_html/wp-content/plugins/aawp/includes/class.aawp-functions.php on line 88
Deprecated: Creation of dynamic property AAWP_Table_Builder_Functions::$teaser_length_unlimited is deprecated in /home/customer/www/footwearboss.com/public_html/wp-content/plugins/aawp/includes/class.aawp-functions.php on line 89
Deprecated: Creation of dynamic property AAWP_Table_Builder_Functions::$teaser_length is deprecated in /home/customer/www/footwearboss.com/public_html/wp-content/plugins/aawp/includes/class.aawp-functions.php on line 90
Deprecated: Creation of dynamic property AAWP_Table_Builder_Functions::$pricing_advertised_price is deprecated in /home/customer/www/footwearboss.com/public_html/wp-content/plugins/aawp/includes/class.aawp-functions.php on line 91
Deprecated: Creation of dynamic property AAWP_Table_Builder_Functions::$pricing_advertised_price_hide_unavailability is deprecated in /home/customer/www/footwearboss.com/public_html/wp-content/plugins/aawp/includes/class.aawp-functions.php on line 92
Deprecated: Creation of dynamic property AAWP_Table_Builder_Functions::$pricing_reduction is deprecated in /home/customer/www/footwearboss.com/public_html/wp-content/plugins/aawp/includes/class.aawp-functions.php on line 93
Deprecated: Creation of dynamic property AAWP_Table_Builder_Functions::$check_prime is deprecated in /home/customer/www/footwearboss.com/public_html/wp-content/plugins/aawp/includes/class.aawp-functions.php on line 94
Deprecated: Creation of dynamic property AAWP_Table_Builder_Functions::$star_rating_size is deprecated in /home/customer/www/footwearboss.com/public_html/wp-content/plugins/aawp/includes/class.aawp-functions.php on line 95
Deprecated: Creation of dynamic property AAWP_Table_Builder_Functions::$star_rating_link is deprecated in /home/customer/www/footwearboss.com/public_html/wp-content/plugins/aawp/includes/class.aawp-functions.php on line 96
Deprecated: Creation of dynamic property AAWP_Table_Builder_Functions::$show_reviews is deprecated in /home/customer/www/footwearboss.com/public_html/wp-content/plugins/aawp/includes/class.aawp-functions.php on line 97
Deprecated: Creation of dynamic property AAWP_Table_Builder_Functions::$button_style is deprecated in /home/customer/www/footwearboss.com/public_html/wp-content/plugins/aawp/includes/class.aawp-functions.php on line 98
Deprecated: Creation of dynamic property AAWP_Table_Builder_Functions::$button_icon is deprecated in /home/customer/www/footwearboss.com/public_html/wp-content/plugins/aawp/includes/class.aawp-functions.php on line 99
Deprecated: Creation of dynamic property AAWP_Table_Builder_Functions::$button_text is deprecated in /home/customer/www/footwearboss.com/public_html/wp-content/plugins/aawp/includes/class.aawp-functions.php on line 100
Deprecated: Creation of dynamic property AAWP_Table_Builder_Functions::$api_country is deprecated in /home/customer/www/footwearboss.com/public_html/wp-content/plugins/aawp/includes/class.aawp-functions.php on line 103
Deprecated: Creation of dynamic property AAWP_Table_Builder_Functions::$api_key is deprecated in /home/customer/www/footwearboss.com/public_html/wp-content/plugins/aawp/includes/class.aawp-functions.php on line 104
Deprecated: Creation of dynamic property AAWP_Table_Builder_Functions::$api_secret_key is deprecated in /home/customer/www/footwearboss.com/public_html/wp-content/plugins/aawp/includes/class.aawp-functions.php on line 105
Deprecated: Creation of dynamic property AAWP_Table_Builder_Functions::$api_associate_tag is deprecated in /home/customer/www/footwearboss.com/public_html/wp-content/plugins/aawp/includes/class.aawp-functions.php on line 106
Deprecated: Creation of dynamic property AAWP_Table_Builder_Functions::$country is deprecated in /home/customer/www/footwearboss.com/public_html/wp-content/plugins/aawp/includes/class.aawp-functions.php on line 109
Deprecated: Creation of dynamic property AAWP_Bestseller_Functions::$items_max is deprecated in /home/customer/www/footwearboss.com/public_html/wp-content/plugins/aawp/includes/class.aawp-functions.php on line 74
Deprecated: Creation of dynamic property AAWP_Bestseller_Functions::$cache_duration is deprecated in /home/customer/www/footwearboss.com/public_html/wp-content/plugins/aawp/includes/class.aawp-functions.php on line 76
Deprecated: Creation of dynamic property AAWP_Bestseller_Functions::$affiliate_links is deprecated in /home/customer/www/footwearboss.com/public_html/wp-content/plugins/aawp/includes/class.aawp-functions.php on line 77
Deprecated: Creation of dynamic property AAWP_Bestseller_Functions::$title_length_unlimited is deprecated in /home/customer/www/footwearboss.com/public_html/wp-content/plugins/aawp/includes/class.aawp-functions.php on line 79
Deprecated: Creation of dynamic property AAWP_Bestseller_Functions::$title_length is deprecated in /home/customer/www/footwearboss.com/public_html/wp-content/plugins/aawp/includes/class.aawp-functions.php on line 80
Deprecated: Creation of dynamic property AAWP_Bestseller_Functions::$title_adding is deprecated in /home/customer/www/footwearboss.com/public_html/wp-content/plugins/aawp/includes/class.aawp-functions.php on line 81
Deprecated: Creation of dynamic property AAWP_Bestseller_Functions::$image_link_title_adding is deprecated in /home/customer/www/footwearboss.com/public_html/wp-content/plugins/aawp/includes/class.aawp-functions.php on line 82
Deprecated: Creation of dynamic property AAWP_Bestseller_Functions::$description_length_unlimited is deprecated in /home/customer/www/footwearboss.com/public_html/wp-content/plugins/aawp/includes/class.aawp-functions.php on line 85
Deprecated: Creation of dynamic property AAWP_Bestseller_Functions::$description_length is deprecated in /home/customer/www/footwearboss.com/public_html/wp-content/plugins/aawp/includes/class.aawp-functions.php on line 86
Deprecated: Creation of dynamic property AAWP_Bestseller_Functions::$description_html is deprecated in /home/customer/www/footwearboss.com/public_html/wp-content/plugins/aawp/includes/class.aawp-functions.php on line 87
Deprecated: Creation of dynamic property AAWP_Bestseller_Functions::$teaser is deprecated in /home/customer/www/footwearboss.com/public_html/wp-content/plugins/aawp/includes/class.aawp-functions.php on line 88
Deprecated: Creation of dynamic property AAWP_Bestseller_Functions::$teaser_length_unlimited is deprecated in /home/customer/www/footwearboss.com/public_html/wp-content/plugins/aawp/includes/class.aawp-functions.php on line 89
Deprecated: Creation of dynamic property AAWP_Bestseller_Functions::$teaser_length is deprecated in /home/customer/www/footwearboss.com/public_html/wp-content/plugins/aawp/includes/class.aawp-functions.php on line 90
Deprecated: Creation of dynamic property AAWP_Bestseller_Functions::$pricing_advertised_price is deprecated in /home/customer/www/footwearboss.com/public_html/wp-content/plugins/aawp/includes/class.aawp-functions.php on line 91
Deprecated: Creation of dynamic property AAWP_Bestseller_Functions::$pricing_advertised_price_hide_unavailability is deprecated in /home/customer/www/footwearboss.com/public_html/wp-content/plugins/aawp/includes/class.aawp-functions.php on line 92
Deprecated: Creation of dynamic property AAWP_Bestseller_Functions::$pricing_reduction is deprecated in /home/customer/www/footwearboss.com/public_html/wp-content/plugins/aawp/includes/class.aawp-functions.php on line 93
Deprecated: Creation of dynamic property AAWP_Bestseller_Functions::$check_prime is deprecated in /home/customer/www/footwearboss.com/public_html/wp-content/plugins/aawp/includes/class.aawp-functions.php on line 94
Deprecated: Creation of dynamic property AAWP_Bestseller_Functions::$star_rating_size is deprecated in /home/customer/www/footwearboss.com/public_html/wp-content/plugins/aawp/includes/class.aawp-functions.php on line 95
Deprecated: Creation of dynamic property AAWP_Bestseller_Functions::$star_rating_link is deprecated in /home/customer/www/footwearboss.com/public_html/wp-content/plugins/aawp/includes/class.aawp-functions.php on line 96
Deprecated: Creation of dynamic property AAWP_Bestseller_Functions::$show_reviews is deprecated in /home/customer/www/footwearboss.com/public_html/wp-content/plugins/aawp/includes/class.aawp-functions.php on line 97
Deprecated: Creation of dynamic property AAWP_Bestseller_Functions::$button_style is deprecated in /home/customer/www/footwearboss.com/public_html/wp-content/plugins/aawp/includes/class.aawp-functions.php on line 98
Deprecated: Creation of dynamic property AAWP_Bestseller_Functions::$button_icon is deprecated in /home/customer/www/footwearboss.com/public_html/wp-content/plugins/aawp/includes/class.aawp-functions.php on line 99
Deprecated: Creation of dynamic property AAWP_Bestseller_Functions::$button_text is deprecated in /home/customer/www/footwearboss.com/public_html/wp-content/plugins/aawp/includes/class.aawp-functions.php on line 100
Deprecated: Creation of dynamic property AAWP_Bestseller_Functions::$api_country is deprecated in /home/customer/www/footwearboss.com/public_html/wp-content/plugins/aawp/includes/class.aawp-functions.php on line 103
Deprecated: Creation of dynamic property AAWP_Bestseller_Functions::$api_key is deprecated in /home/customer/www/footwearboss.com/public_html/wp-content/plugins/aawp/includes/class.aawp-functions.php on line 104
Deprecated: Creation of dynamic property AAWP_Bestseller_Functions::$api_secret_key is deprecated in /home/customer/www/footwearboss.com/public_html/wp-content/plugins/aawp/includes/class.aawp-functions.php on line 105
Deprecated: Creation of dynamic property AAWP_Bestseller_Functions::$api_associate_tag is deprecated in /home/customer/www/footwearboss.com/public_html/wp-content/plugins/aawp/includes/class.aawp-functions.php on line 106
Deprecated: Creation of dynamic property AAWP_Bestseller_Functions::$country is deprecated in /home/customer/www/footwearboss.com/public_html/wp-content/plugins/aawp/includes/class.aawp-functions.php on line 109
Deprecated: Creation of dynamic property AAWP_Box_Functions::$items_max is deprecated in /home/customer/www/footwearboss.com/public_html/wp-content/plugins/aawp/includes/class.aawp-functions.php on line 74
Deprecated: Creation of dynamic property AAWP_Box_Functions::$cache_duration is deprecated in /home/customer/www/footwearboss.com/public_html/wp-content/plugins/aawp/includes/class.aawp-functions.php on line 76
Deprecated: Creation of dynamic property AAWP_Box_Functions::$affiliate_links is deprecated in /home/customer/www/footwearboss.com/public_html/wp-content/plugins/aawp/includes/class.aawp-functions.php on line 77
Deprecated: Creation of dynamic property AAWP_Box_Functions::$title_length_unlimited is deprecated in /home/customer/www/footwearboss.com/public_html/wp-content/plugins/aawp/includes/class.aawp-functions.php on line 79
Deprecated: Creation of dynamic property AAWP_Box_Functions::$title_length is deprecated in /home/customer/www/footwearboss.com/public_html/wp-content/plugins/aawp/includes/class.aawp-functions.php on line 80
Deprecated: Creation of dynamic property AAWP_Box_Functions::$title_adding is deprecated in /home/customer/www/footwearboss.com/public_html/wp-content/plugins/aawp/includes/class.aawp-functions.php on line 81
Deprecated: Creation of dynamic property AAWP_Box_Functions::$image_link_title_adding is deprecated in /home/customer/www/footwearboss.com/public_html/wp-content/plugins/aawp/includes/class.aawp-functions.php on line 82
Deprecated: Creation of dynamic property AAWP_Box_Functions::$description_length_unlimited is deprecated in /home/customer/www/footwearboss.com/public_html/wp-content/plugins/aawp/includes/class.aawp-functions.php on line 85
Deprecated: Creation of dynamic property AAWP_Box_Functions::$description_length is deprecated in /home/customer/www/footwearboss.com/public_html/wp-content/plugins/aawp/includes/class.aawp-functions.php on line 86
Deprecated: Creation of dynamic property AAWP_Box_Functions::$description_html is deprecated in /home/customer/www/footwearboss.com/public_html/wp-content/plugins/aawp/includes/class.aawp-functions.php on line 87
Deprecated: Creation of dynamic property AAWP_Box_Functions::$teaser is deprecated in /home/customer/www/footwearboss.com/public_html/wp-content/plugins/aawp/includes/class.aawp-functions.php on line 88
Deprecated: Creation of dynamic property AAWP_Box_Functions::$teaser_length_unlimited is deprecated in /home/customer/www/footwearboss.com/public_html/wp-content/plugins/aawp/includes/class.aawp-functions.php on line 89
Deprecated: Creation of dynamic property AAWP_Box_Functions::$teaser_length is deprecated in /home/customer/www/footwearboss.com/public_html/wp-content/plugins/aawp/includes/class.aawp-functions.php on line 90
Deprecated: Creation of dynamic property AAWP_Box_Functions::$pricing_advertised_price is deprecated in /home/customer/www/footwearboss.com/public_html/wp-content/plugins/aawp/includes/class.aawp-functions.php on line 91
Deprecated: Creation of dynamic property AAWP_Box_Functions::$pricing_advertised_price_hide_unavailability is deprecated in /home/customer/www/footwearboss.com/public_html/wp-content/plugins/aawp/includes/class.aawp-functions.php on line 92
Deprecated: Creation of dynamic property AAWP_Box_Functions::$pricing_reduction is deprecated in /home/customer/www/footwearboss.com/public_html/wp-content/plugins/aawp/includes/class.aawp-functions.php on line 93
Deprecated: Creation of dynamic property AAWP_Box_Functions::$check_prime is deprecated in /home/customer/www/footwearboss.com/public_html/wp-content/plugins/aawp/includes/class.aawp-functions.php on line 94
Deprecated: Creation of dynamic property AAWP_Box_Functions::$star_rating_size is deprecated in /home/customer/www/footwearboss.com/public_html/wp-content/plugins/aawp/includes/class.aawp-functions.php on line 95
Deprecated: Creation of dynamic property AAWP_Box_Functions::$star_rating_link is deprecated in /home/customer/www/footwearboss.com/public_html/wp-content/plugins/aawp/includes/class.aawp-functions.php on line 96
Deprecated: Creation of dynamic property AAWP_Box_Functions::$show_reviews is deprecated in /home/customer/www/footwearboss.com/public_html/wp-content/plugins/aawp/includes/class.aawp-functions.php on line 97
Deprecated: Creation of dynamic property AAWP_Box_Functions::$button_style is deprecated in /home/customer/www/footwearboss.com/public_html/wp-content/plugins/aawp/includes/class.aawp-functions.php on line 98
Deprecated: Creation of dynamic property AAWP_Box_Functions::$button_icon is deprecated in /home/customer/www/footwearboss.com/public_html/wp-content/plugins/aawp/includes/class.aawp-functions.php on line 99
Deprecated: Creation of dynamic property AAWP_Box_Functions::$button_text is deprecated in /home/customer/www/footwearboss.com/public_html/wp-content/plugins/aawp/includes/class.aawp-functions.php on line 100
Deprecated: Creation of dynamic property AAWP_Box_Functions::$api_country is deprecated in /home/customer/www/footwearboss.com/public_html/wp-content/plugins/aawp/includes/class.aawp-functions.php on line 103
Deprecated: Creation of dynamic property AAWP_Box_Functions::$api_key is deprecated in /home/customer/www/footwearboss.com/public_html/wp-content/plugins/aawp/includes/class.aawp-functions.php on line 104
Deprecated: Creation of dynamic property AAWP_Box_Functions::$api_secret_key is deprecated in /home/customer/www/footwearboss.com/public_html/wp-content/plugins/aawp/includes/class.aawp-functions.php on line 105
Deprecated: Creation of dynamic property AAWP_Box_Functions::$api_associate_tag is deprecated in /home/customer/www/footwearboss.com/public_html/wp-content/plugins/aawp/includes/class.aawp-functions.php on line 106
Deprecated: Creation of dynamic property AAWP_Box_Functions::$country is deprecated in /home/customer/www/footwearboss.com/public_html/wp-content/plugins/aawp/includes/class.aawp-functions.php on line 109
Deprecated: Creation of dynamic property AAWP_Extended_Functions::$items_max is deprecated in /home/customer/www/footwearboss.com/public_html/wp-content/plugins/aawp/includes/class.aawp-functions.php on line 74
Deprecated: Creation of dynamic property AAWP_Extended_Functions::$cache_duration is deprecated in /home/customer/www/footwearboss.com/public_html/wp-content/plugins/aawp/includes/class.aawp-functions.php on line 76
Deprecated: Creation of dynamic property AAWP_Extended_Functions::$affiliate_links is deprecated in /home/customer/www/footwearboss.com/public_html/wp-content/plugins/aawp/includes/class.aawp-functions.php on line 77
Deprecated: Creation of dynamic property AAWP_Extended_Functions::$title_length_unlimited is deprecated in /home/customer/www/footwearboss.com/public_html/wp-content/plugins/aawp/includes/class.aawp-functions.php on line 79
Deprecated: Creation of dynamic property AAWP_Extended_Functions::$title_length is deprecated in /home/customer/www/footwearboss.com/public_html/wp-content/plugins/aawp/includes/class.aawp-functions.php on line 80
Deprecated: Creation of dynamic property AAWP_Extended_Functions::$title_adding is deprecated in /home/customer/www/footwearboss.com/public_html/wp-content/plugins/aawp/includes/class.aawp-functions.php on line 81
Deprecated: Creation of dynamic property AAWP_Extended_Functions::$image_link_title_adding is deprecated in /home/customer/www/footwearboss.com/public_html/wp-content/plugins/aawp/includes/class.aawp-functions.php on line 82
Deprecated: Creation of dynamic property AAWP_Extended_Functions::$description_length_unlimited is deprecated in /home/customer/www/footwearboss.com/public_html/wp-content/plugins/aawp/includes/class.aawp-functions.php on line 85
Deprecated: Creation of dynamic property AAWP_Extended_Functions::$description_length is deprecated in /home/customer/www/footwearboss.com/public_html/wp-content/plugins/aawp/includes/class.aawp-functions.php on line 86
Deprecated: Creation of dynamic property AAWP_Extended_Functions::$description_html is deprecated in /home/customer/www/footwearboss.com/public_html/wp-content/plugins/aawp/includes/class.aawp-functions.php on line 87
Deprecated: Creation of dynamic property AAWP_Extended_Functions::$teaser is deprecated in /home/customer/www/footwearboss.com/public_html/wp-content/plugins/aawp/includes/class.aawp-functions.php on line 88
Deprecated: Creation of dynamic property AAWP_Extended_Functions::$teaser_length_unlimited is deprecated in /home/customer/www/footwearboss.com/public_html/wp-content/plugins/aawp/includes/class.aawp-functions.php on line 89
Deprecated: Creation of dynamic property AAWP_Extended_Functions::$teaser_length is deprecated in /home/customer/www/footwearboss.com/public_html/wp-content/plugins/aawp/includes/class.aawp-functions.php on line 90
Deprecated: Creation of dynamic property AAWP_Extended_Functions::$pricing_advertised_price is deprecated in /home/customer/www/footwearboss.com/public_html/wp-content/plugins/aawp/includes/class.aawp-functions.php on line 91
Deprecated: Creation of dynamic property AAWP_Extended_Functions::$pricing_advertised_price_hide_unavailability is deprecated in /home/customer/www/footwearboss.com/public_html/wp-content/plugins/aawp/includes/class.aawp-functions.php on line 92
Deprecated: Creation of dynamic property AAWP_Extended_Functions::$pricing_reduction is deprecated in /home/customer/www/footwearboss.com/public_html/wp-content/plugins/aawp/includes/class.aawp-functions.php on line 93
Deprecated: Creation of dynamic property AAWP_Extended_Functions::$check_prime is deprecated in /home/customer/www/footwearboss.com/public_html/wp-content/plugins/aawp/includes/class.aawp-functions.php on line 94
Deprecated: Creation of dynamic property AAWP_Extended_Functions::$star_rating_size is deprecated in /home/customer/www/footwearboss.com/public_html/wp-content/plugins/aawp/includes/class.aawp-functions.php on line 95
Deprecated: Creation of dynamic property AAWP_Extended_Functions::$star_rating_link is deprecated in /home/customer/www/footwearboss.com/public_html/wp-content/plugins/aawp/includes/class.aawp-functions.php on line 96
Deprecated: Creation of dynamic property AAWP_Extended_Functions::$show_reviews is deprecated in /home/customer/www/footwearboss.com/public_html/wp-content/plugins/aawp/includes/class.aawp-functions.php on line 97
Deprecated: Creation of dynamic property AAWP_Extended_Functions::$button_style is deprecated in /home/customer/www/footwearboss.com/public_html/wp-content/plugins/aawp/includes/class.aawp-functions.php on line 98
Deprecated: Creation of dynamic property AAWP_Extended_Functions::$button_icon is deprecated in /home/customer/www/footwearboss.com/public_html/wp-content/plugins/aawp/includes/class.aawp-functions.php on line 99
Deprecated: Creation of dynamic property AAWP_Extended_Functions::$button_text is deprecated in /home/customer/www/footwearboss.com/public_html/wp-content/plugins/aawp/includes/class.aawp-functions.php on line 100
Deprecated: Creation of dynamic property AAWP_Extended_Functions::$api_country is deprecated in /home/customer/www/footwearboss.com/public_html/wp-content/plugins/aawp/includes/class.aawp-functions.php on line 103
Deprecated: Creation of dynamic property AAWP_Extended_Functions::$api_key is deprecated in /home/customer/www/footwearboss.com/public_html/wp-content/plugins/aawp/includes/class.aawp-functions.php on line 104
Deprecated: Creation of dynamic property AAWP_Extended_Functions::$api_secret_key is deprecated in /home/customer/www/footwearboss.com/public_html/wp-content/plugins/aawp/includes/class.aawp-functions.php on line 105
Deprecated: Creation of dynamic property AAWP_Extended_Functions::$api_associate_tag is deprecated in /home/customer/www/footwearboss.com/public_html/wp-content/plugins/aawp/includes/class.aawp-functions.php on line 106
Deprecated: Creation of dynamic property AAWP_Extended_Functions::$country is deprecated in /home/customer/www/footwearboss.com/public_html/wp-content/plugins/aawp/includes/class.aawp-functions.php on line 109
Deprecated: Creation of dynamic property AAWP_Fields_Functions::$items_max is deprecated in /home/customer/www/footwearboss.com/public_html/wp-content/plugins/aawp/includes/class.aawp-functions.php on line 74
Deprecated: Creation of dynamic property AAWP_Fields_Functions::$cache_duration is deprecated in /home/customer/www/footwearboss.com/public_html/wp-content/plugins/aawp/includes/class.aawp-functions.php on line 76
Deprecated: Creation of dynamic property AAWP_Fields_Functions::$affiliate_links is deprecated in /home/customer/www/footwearboss.com/public_html/wp-content/plugins/aawp/includes/class.aawp-functions.php on line 77
Deprecated: Creation of dynamic property AAWP_Fields_Functions::$title_length_unlimited is deprecated in /home/customer/www/footwearboss.com/public_html/wp-content/plugins/aawp/includes/class.aawp-functions.php on line 79
Deprecated: Creation of dynamic property AAWP_Fields_Functions::$title_length is deprecated in /home/customer/www/footwearboss.com/public_html/wp-content/plugins/aawp/includes/class.aawp-functions.php on line 80
Deprecated: Creation of dynamic property AAWP_Fields_Functions::$title_adding is deprecated in /home/customer/www/footwearboss.com/public_html/wp-content/plugins/aawp/includes/class.aawp-functions.php on line 81
Deprecated: Creation of dynamic property AAWP_Fields_Functions::$image_link_title_adding is deprecated in /home/customer/www/footwearboss.com/public_html/wp-content/plugins/aawp/includes/class.aawp-functions.php on line 82
Deprecated: Creation of dynamic property AAWP_Fields_Functions::$description_length_unlimited is deprecated in /home/customer/www/footwearboss.com/public_html/wp-content/plugins/aawp/includes/class.aawp-functions.php on line 85
Deprecated: Creation of dynamic property AAWP_Fields_Functions::$description_length is deprecated in /home/customer/www/footwearboss.com/public_html/wp-content/plugins/aawp/includes/class.aawp-functions.php on line 86
Deprecated: Creation of dynamic property AAWP_Fields_Functions::$description_html is deprecated in /home/customer/www/footwearboss.com/public_html/wp-content/plugins/aawp/includes/class.aawp-functions.php on line 87
Deprecated: Creation of dynamic property AAWP_Fields_Functions::$teaser is deprecated in /home/customer/www/footwearboss.com/public_html/wp-content/plugins/aawp/includes/class.aawp-functions.php on line 88
Deprecated: Creation of dynamic property AAWP_Fields_Functions::$teaser_length_unlimited is deprecated in /home/customer/www/footwearboss.com/public_html/wp-content/plugins/aawp/includes/class.aawp-functions.php on line 89
Deprecated: Creation of dynamic property AAWP_Fields_Functions::$teaser_length is deprecated in /home/customer/www/footwearboss.com/public_html/wp-content/plugins/aawp/includes/class.aawp-functions.php on line 90
Deprecated: Creation of dynamic property AAWP_Fields_Functions::$pricing_advertised_price is deprecated in /home/customer/www/footwearboss.com/public_html/wp-content/plugins/aawp/includes/class.aawp-functions.php on line 91
Deprecated: Creation of dynamic property AAWP_Fields_Functions::$pricing_advertised_price_hide_unavailability is deprecated in /home/customer/www/footwearboss.com/public_html/wp-content/plugins/aawp/includes/class.aawp-functions.php on line 92
Deprecated: Creation of dynamic property AAWP_Fields_Functions::$pricing_reduction is deprecated in /home/customer/www/footwearboss.com/public_html/wp-content/plugins/aawp/includes/class.aawp-functions.php on line 93
Deprecated: Creation of dynamic property AAWP_Fields_Functions::$check_prime is deprecated in /home/customer/www/footwearboss.com/public_html/wp-content/plugins/aawp/includes/class.aawp-functions.php on line 94
Deprecated: Creation of dynamic property AAWP_Fields_Functions::$star_rating_size is deprecated in /home/customer/www/footwearboss.com/public_html/wp-content/plugins/aawp/includes/class.aawp-functions.php on line 95
Deprecated: Creation of dynamic property AAWP_Fields_Functions::$star_rating_link is deprecated in /home/customer/www/footwearboss.com/public_html/wp-content/plugins/aawp/includes/class.aawp-functions.php on line 96
Deprecated: Creation of dynamic property AAWP_Fields_Functions::$show_reviews is deprecated in /home/customer/www/footwearboss.com/public_html/wp-content/plugins/aawp/includes/class.aawp-functions.php on line 97
Deprecated: Creation of dynamic property AAWP_Fields_Functions::$button_style is deprecated in /home/customer/www/footwearboss.com/public_html/wp-content/plugins/aawp/includes/class.aawp-functions.php on line 98
Deprecated: Creation of dynamic property AAWP_Fields_Functions::$button_icon is deprecated in /home/customer/www/footwearboss.com/public_html/wp-content/plugins/aawp/includes/class.aawp-functions.php on line 99
Deprecated: Creation of dynamic property AAWP_Fields_Functions::$button_text is deprecated in /home/customer/www/footwearboss.com/public_html/wp-content/plugins/aawp/includes/class.aawp-functions.php on line 100
Deprecated: Creation of dynamic property AAWP_Fields_Functions::$api_country is deprecated in /home/customer/www/footwearboss.com/public_html/wp-content/plugins/aawp/includes/class.aawp-functions.php on line 103
Deprecated: Creation of dynamic property AAWP_Fields_Functions::$api_key is deprecated in /home/customer/www/footwearboss.com/public_html/wp-content/plugins/aawp/includes/class.aawp-functions.php on line 104
Deprecated: Creation of dynamic property AAWP_Fields_Functions::$api_secret_key is deprecated in /home/customer/www/footwearboss.com/public_html/wp-content/plugins/aawp/includes/class.aawp-functions.php on line 105
Deprecated: Creation of dynamic property AAWP_Fields_Functions::$api_associate_tag is deprecated in /home/customer/www/footwearboss.com/public_html/wp-content/plugins/aawp/includes/class.aawp-functions.php on line 106
Deprecated: Creation of dynamic property AAWP_Fields_Functions::$country is deprecated in /home/customer/www/footwearboss.com/public_html/wp-content/plugins/aawp/includes/class.aawp-functions.php on line 109
Deprecated: Creation of dynamic property AAWP_Link_Functions::$items_max is deprecated in /home/customer/www/footwearboss.com/public_html/wp-content/plugins/aawp/includes/class.aawp-functions.php on line 74
Deprecated: Creation of dynamic property AAWP_Link_Functions::$cache_duration is deprecated in /home/customer/www/footwearboss.com/public_html/wp-content/plugins/aawp/includes/class.aawp-functions.php on line 76
Deprecated: Creation of dynamic property AAWP_Link_Functions::$affiliate_links is deprecated in /home/customer/www/footwearboss.com/public_html/wp-content/plugins/aawp/includes/class.aawp-functions.php on line 77
Deprecated: Creation of dynamic property AAWP_Link_Functions::$title_length_unlimited is deprecated in /home/customer/www/footwearboss.com/public_html/wp-content/plugins/aawp/includes/class.aawp-functions.php on line 79
Deprecated: Creation of dynamic property AAWP_Link_Functions::$title_length is deprecated in /home/customer/www/footwearboss.com/public_html/wp-content/plugins/aawp/includes/class.aawp-functions.php on line 80
Deprecated: Creation of dynamic property AAWP_Link_Functions::$title_adding is deprecated in /home/customer/www/footwearboss.com/public_html/wp-content/plugins/aawp/includes/class.aawp-functions.php on line 81
Deprecated: Creation of dynamic property AAWP_Link_Functions::$image_link_title_adding is deprecated in /home/customer/www/footwearboss.com/public_html/wp-content/plugins/aawp/includes/class.aawp-functions.php on line 82
Deprecated: Creation of dynamic property AAWP_Link_Functions::$description_length_unlimited is deprecated in /home/customer/www/footwearboss.com/public_html/wp-content/plugins/aawp/includes/class.aawp-functions.php on line 85
Deprecated: Creation of dynamic property AAWP_Link_Functions::$description_length is deprecated in /home/customer/www/footwearboss.com/public_html/wp-content/plugins/aawp/includes/class.aawp-functions.php on line 86
Deprecated: Creation of dynamic property AAWP_Link_Functions::$description_html is deprecated in /home/customer/www/footwearboss.com/public_html/wp-content/plugins/aawp/includes/class.aawp-functions.php on line 87
Deprecated: Creation of dynamic property AAWP_Link_Functions::$teaser is deprecated in /home/customer/www/footwearboss.com/public_html/wp-content/plugins/aawp/includes/class.aawp-functions.php on line 88
Deprecated: Creation of dynamic property AAWP_Link_Functions::$teaser_length_unlimited is deprecated in /home/customer/www/footwearboss.com/public_html/wp-content/plugins/aawp/includes/class.aawp-functions.php on line 89
Deprecated: Creation of dynamic property AAWP_Link_Functions::$teaser_length is deprecated in /home/customer/www/footwearboss.com/public_html/wp-content/plugins/aawp/includes/class.aawp-functions.php on line 90
Deprecated: Creation of dynamic property AAWP_Link_Functions::$pricing_advertised_price is deprecated in /home/customer/www/footwearboss.com/public_html/wp-content/plugins/aawp/includes/class.aawp-functions.php on line 91
Deprecated: Creation of dynamic property AAWP_Link_Functions::$pricing_advertised_price_hide_unavailability is deprecated in /home/customer/www/footwearboss.com/public_html/wp-content/plugins/aawp/includes/class.aawp-functions.php on line 92
Deprecated: Creation of dynamic property AAWP_Link_Functions::$pricing_reduction is deprecated in /home/customer/www/footwearboss.com/public_html/wp-content/plugins/aawp/includes/class.aawp-functions.php on line 93
Deprecated: Creation of dynamic property AAWP_Link_Functions::$check_prime is deprecated in /home/customer/www/footwearboss.com/public_html/wp-content/plugins/aawp/includes/class.aawp-functions.php on line 94
Deprecated: Creation of dynamic property AAWP_Link_Functions::$star_rating_size is deprecated in /home/customer/www/footwearboss.com/public_html/wp-content/plugins/aawp/includes/class.aawp-functions.php on line 95
Deprecated: Creation of dynamic property AAWP_Link_Functions::$star_rating_link is deprecated in /home/customer/www/footwearboss.com/public_html/wp-content/plugins/aawp/includes/class.aawp-functions.php on line 96
Deprecated: Creation of dynamic property AAWP_Link_Functions::$show_reviews is deprecated in /home/customer/www/footwearboss.com/public_html/wp-content/plugins/aawp/includes/class.aawp-functions.php on line 97
Deprecated: Creation of dynamic property AAWP_Link_Functions::$button_style is deprecated in /home/customer/www/footwearboss.com/public_html/wp-content/plugins/aawp/includes/class.aawp-functions.php on line 98
Deprecated: Creation of dynamic property AAWP_Link_Functions::$button_icon is deprecated in /home/customer/www/footwearboss.com/public_html/wp-content/plugins/aawp/includes/class.aawp-functions.php on line 99
Deprecated: Creation of dynamic property AAWP_Link_Functions::$button_text is deprecated in /home/customer/www/footwearboss.com/public_html/wp-content/plugins/aawp/includes/class.aawp-functions.php on line 100
Deprecated: Creation of dynamic property AAWP_Link_Functions::$api_country is deprecated in /home/customer/www/footwearboss.com/public_html/wp-content/plugins/aawp/includes/class.aawp-functions.php on line 103
Deprecated: Creation of dynamic property AAWP_Link_Functions::$api_key is deprecated in /home/customer/www/footwearboss.com/public_html/wp-content/plugins/aawp/includes/class.aawp-functions.php on line 104
Deprecated: Creation of dynamic property AAWP_Link_Functions::$api_secret_key is deprecated in /home/customer/www/footwearboss.com/public_html/wp-content/plugins/aawp/includes/class.aawp-functions.php on line 105
Deprecated: Creation of dynamic property AAWP_Link_Functions::$api_associate_tag is deprecated in /home/customer/www/footwearboss.com/public_html/wp-content/plugins/aawp/includes/class.aawp-functions.php on line 106
Deprecated: Creation of dynamic property AAWP_Link_Functions::$country is deprecated in /home/customer/www/footwearboss.com/public_html/wp-content/plugins/aawp/includes/class.aawp-functions.php on line 109
Deprecated: Creation of dynamic property AAWP_New_Releases_Functions::$items_max is deprecated in /home/customer/www/footwearboss.com/public_html/wp-content/plugins/aawp/includes/class.aawp-functions.php on line 74
Deprecated: Creation of dynamic property AAWP_New_Releases_Functions::$cache_duration is deprecated in /home/customer/www/footwearboss.com/public_html/wp-content/plugins/aawp/includes/class.aawp-functions.php on line 76
Deprecated: Creation of dynamic property AAWP_New_Releases_Functions::$affiliate_links is deprecated in /home/customer/www/footwearboss.com/public_html/wp-content/plugins/aawp/includes/class.aawp-functions.php on line 77
Deprecated: Creation of dynamic property AAWP_New_Releases_Functions::$title_length_unlimited is deprecated in /home/customer/www/footwearboss.com/public_html/wp-content/plugins/aawp/includes/class.aawp-functions.php on line 79
Deprecated: Creation of dynamic property AAWP_New_Releases_Functions::$title_length is deprecated in /home/customer/www/footwearboss.com/public_html/wp-content/plugins/aawp/includes/class.aawp-functions.php on line 80
Deprecated: Creation of dynamic property AAWP_New_Releases_Functions::$title_adding is deprecated in /home/customer/www/footwearboss.com/public_html/wp-content/plugins/aawp/includes/class.aawp-functions.php on line 81
Deprecated: Creation of dynamic property AAWP_New_Releases_Functions::$image_link_title_adding is deprecated in /home/customer/www/footwearboss.com/public_html/wp-content/plugins/aawp/includes/class.aawp-functions.php on line 82
Deprecated: Creation of dynamic property AAWP_New_Releases_Functions::$description_length_unlimited is deprecated in /home/customer/www/footwearboss.com/public_html/wp-content/plugins/aawp/includes/class.aawp-functions.php on line 85
Deprecated: Creation of dynamic property AAWP_New_Releases_Functions::$description_length is deprecated in /home/customer/www/footwearboss.com/public_html/wp-content/plugins/aawp/includes/class.aawp-functions.php on line 86
Deprecated: Creation of dynamic property AAWP_New_Releases_Functions::$description_html is deprecated in /home/customer/www/footwearboss.com/public_html/wp-content/plugins/aawp/includes/class.aawp-functions.php on line 87
Deprecated: Creation of dynamic property AAWP_New_Releases_Functions::$teaser is deprecated in /home/customer/www/footwearboss.com/public_html/wp-content/plugins/aawp/includes/class.aawp-functions.php on line 88
Deprecated: Creation of dynamic property AAWP_New_Releases_Functions::$teaser_length_unlimited is deprecated in /home/customer/www/footwearboss.com/public_html/wp-content/plugins/aawp/includes/class.aawp-functions.php on line 89
Deprecated: Creation of dynamic property AAWP_New_Releases_Functions::$teaser_length is deprecated in /home/customer/www/footwearboss.com/public_html/wp-content/plugins/aawp/includes/class.aawp-functions.php on line 90
Deprecated: Creation of dynamic property AAWP_New_Releases_Functions::$pricing_advertised_price is deprecated in /home/customer/www/footwearboss.com/public_html/wp-content/plugins/aawp/includes/class.aawp-functions.php on line 91
Deprecated: Creation of dynamic property AAWP_New_Releases_Functions::$pricing_advertised_price_hide_unavailability is deprecated in /home/customer/www/footwearboss.com/public_html/wp-content/plugins/aawp/includes/class.aawp-functions.php on line 92
Deprecated: Creation of dynamic property AAWP_New_Releases_Functions::$pricing_reduction is deprecated in /home/customer/www/footwearboss.com/public_html/wp-content/plugins/aawp/includes/class.aawp-functions.php on line 93
Deprecated: Creation of dynamic property AAWP_New_Releases_Functions::$check_prime is deprecated in /home/customer/www/footwearboss.com/public_html/wp-content/plugins/aawp/includes/class.aawp-functions.php on line 94
Deprecated: Creation of dynamic property AAWP_New_Releases_Functions::$star_rating_size is deprecated in /home/customer/www/footwearboss.com/public_html/wp-content/plugins/aawp/includes/class.aawp-functions.php on line 95
Deprecated: Creation of dynamic property AAWP_New_Releases_Functions::$star_rating_link is deprecated in /home/customer/www/footwearboss.com/public_html/wp-content/plugins/aawp/includes/class.aawp-functions.php on line 96
Deprecated: Creation of dynamic property AAWP_New_Releases_Functions::$show_reviews is deprecated in /home/customer/www/footwearboss.com/public_html/wp-content/plugins/aawp/includes/class.aawp-functions.php on line 97
Deprecated: Creation of dynamic property AAWP_New_Releases_Functions::$button_style is deprecated in /home/customer/www/footwearboss.com/public_html/wp-content/plugins/aawp/includes/class.aawp-functions.php on line 98
Deprecated: Creation of dynamic property AAWP_New_Releases_Functions::$button_icon is deprecated in /home/customer/www/footwearboss.com/public_html/wp-content/plugins/aawp/includes/class.aawp-functions.php on line 99
Deprecated: Creation of dynamic property AAWP_New_Releases_Functions::$button_text is deprecated in /home/customer/www/footwearboss.com/public_html/wp-content/plugins/aawp/includes/class.aawp-functions.php on line 100
Deprecated: Creation of dynamic property AAWP_New_Releases_Functions::$api_country is deprecated in /home/customer/www/footwearboss.com/public_html/wp-content/plugins/aawp/includes/class.aawp-functions.php on line 103
Deprecated: Creation of dynamic property AAWP_New_Releases_Functions::$api_key is deprecated in /home/customer/www/footwearboss.com/public_html/wp-content/plugins/aawp/includes/class.aawp-functions.php on line 104
Deprecated: Creation of dynamic property AAWP_New_Releases_Functions::$api_secret_key is deprecated in /home/customer/www/footwearboss.com/public_html/wp-content/plugins/aawp/includes/class.aawp-functions.php on line 105
Deprecated: Creation of dynamic property AAWP_New_Releases_Functions::$api_associate_tag is deprecated in /home/customer/www/footwearboss.com/public_html/wp-content/plugins/aawp/includes/class.aawp-functions.php on line 106
Deprecated: Creation of dynamic property AAWP_New_Releases_Functions::$country is deprecated in /home/customer/www/footwearboss.com/public_html/wp-content/plugins/aawp/includes/class.aawp-functions.php on line 109 How To Make Elf Shoe Covers | 7 Easy Guide | Footwear Boss
Elf shoes are a type of classical foot-wears that does not pass through the usual production process. After making them, you will need to make them a cover for protection against damages.
Elf shoes are green boots that a product of 100% polyester. They have upturned toes and a red pom-pom at the tips. It fits up to men’s shoe size twelve.
How To Make Elf Shoe Covers | Advanced Procedure!
By definition, these are extra-ordinary kind of shoes. When making other types of shoes, you will either use leather or rubber. On the contrary, making elf shoes require one to use a light polyester.
For more information on how to do it, please read through this article.
How long does it take to make this kind of shoes?
If you have all the necessary material, it will take you not more than two hours to complete the task. The duration will also depend on the level of expertise of an individual. Professional shoemakers can take even less than one hour to make a pair, as long as they have everything ready.
On the other hand, learners can take even up to five hours to come up with a complete product.
What is the color of the elf shoes?
These shoes have one universal color, which is green. A lot of design colors have come up before, but they have never taken shape. The green color is unique and iconic, and a good trademark for this type of shoes.
The procedure.
Develop a shoe template on a piece of cardboard.
Place your foot on cardboard, and take a pencil, then draw out the borders. Measure the total length of your foot. You will also require to measure the height of the leg from the ground to the ankle. From that point, transfer these measurements to develop the patterns for the elf shoes.
You can use the pencil to draw out the pattern of the foot on cardboard. Use a tape measure to get the height to the ankle.
Trace the measurements on a piece of polyester.
Transfer these measurements on a piece of polyester, from which you will cut out the material for the shoe and the cover. The cuttings should have the sole, fringe, and the side shoe templates. Make visible marks so, preferably using a permanent marker pen, before using the scissor to cut out the areas of interest.
You can use multicolored material when making the shoe. For the sole, use white material. Choose green for the side shoe pieces. For the fringe piece, you can settle for a red color.
To cut the soles, pin the two materials together and use a pair of sharp scissors to complete the task. On the other hand, when cutting out the fringe, trace the pattern onto the folded small piece of fabric. It should have a size similar to an A4 paper.
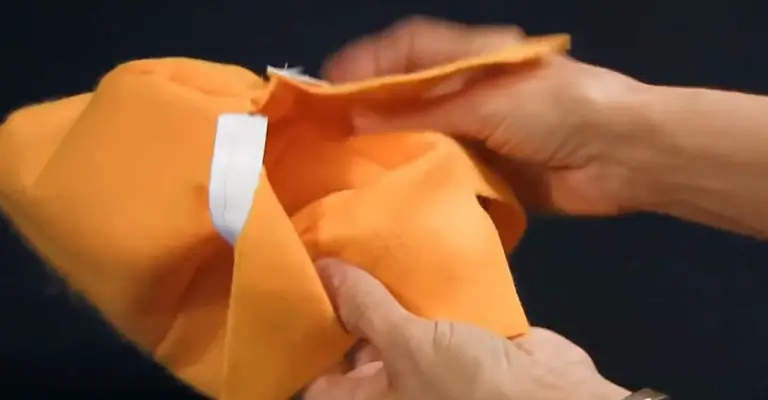
Sew the ends of the fabric together.
Use an appropriate needle thread to sew the pieces together. Do not forget to use the same theme as that of the shoe that is a green thread for green shoes. Stitch the heels of the side shoe fabric portions together, to get a seamless product. Place the product after stitching on a flat surface and observe if it looks like it is reflecting each other’s side.
If you achieve that, then you are on the right track to achieving the end product that is the elf shoe.
Sew the fringe onto the top portion of the shoe.
The fringe is always red. When sewing it, you should use a red stitch, preferably. Align the fringe-cover along with the ankles on both sides. At this moment, the inner part of the shoe is facing outside. That means the fringe stitches should also be facing outwards. When you finish stitching the inner part, then it should be easy to turn the shoe, outside-in.
The stitches should not appear on the outer part of the shoe. You can do this either by hand or even a sewing machine. The Sewing Flow has stated clearly and in detail, how to sew leather with a sewing machine?
Sew the sole to the bottom side of the shoe pieces and the cover.
To do this, you will need to pin the sole to have it stable when sewing. Make sure that you have turned the shoe inside out before attaching the sole. If you do it without turning, then you will end up having the sole in the wrong direction.
Consider trimming any excess fabric in the seams so that the shoe will have an excellent finish. You can use a pair of sharp scissors, before turning the shoe outside-in. Always be careful not to damage it by cutting it more than you need to do so.
Sew the shoe’s side pieces.
You will need to connect them and pin the top. The unsewn edges run vertically down the front of the shoe. When you finish sewing this part, you would be through with the work. Make sure that you do not sew the edges up to the ankles. When you finish, the shoe should be wide enough for the feet to get in comfortably.
Make sure that the cover fits well as well. It is an integral part of the shoe.
Do the final finishing and touches.
All the while, they were facing an inside-out position. You will need to flip it back to its normal position and make the final adjustments. Tuck and position the shoe so that the fabric goes inside, and cannot be visible from outside.
Here, you can also attach other decorations by using glue. Some of these decorations can be flowers and jingle bells. The bells should be on the tip of the shoes, and you will need an adhesive glue to attach.
Before you wear the shoe, make sure that the glue dries out well, or otherwise, the decoration will fall off.
For more details
Conclusion
Making elf shoe covers is one of the best things to do. The process is short and can take less than two hours to complete. There are several ways in which you can do the work, only that you have to follow the steps as it should be. When you finish, give it sufficient time for the glue to dry off before wearing it.
About David Johnson
David M. Johnson is currently a writer and blogger with great passions for footwear, health, and fitness. He's an avid weightlifter, travel enthusiast, and lover of espresso. David also a passionate runner and triathlete who has worked for many years in the sports footwear industry. More About David